Navigation Gear
Getting lost in the wilderness is a serious, potentially life-threatening situation. Navigation tools are essential safety equipment, not optional accessories. Yet many hikers venture into unfamiliar terrain relying solely on a smartphone with spotty battery life and no backup plan. Understanding navigation options—from traditional topographic maps and compass to modern GPS devices and phone apps—and knowing how to use them properly can mean the difference between a minor inconvenience and a genuine emergency.
The reality is that each navigation system has strengths and weaknesses. Paper maps never run out of battery but require skill to interpret. Smartphones are convenient but batteries die and screens crack. GPS devices are reliable but expensive. The smart approach isn't choosing one system—it's understanding how each works and carrying backup navigation that doesn't depend on electronics.
This guide walks through the three primary navigation systems available to hikers and backpackers, explaining how each works, their advantages and limitations, and the critical skills you need to practice before you actually need them on the trail.
The Golden Rule: Always Carry Backup Navigation
Critical Safety Principle: Never rely on a single navigation system, especially electronics. Phones die, GPS units fail, screens break, and satellites lose signal. Always carry backup navigation that doesn't require batteries.
Recommended minimum for any wilderness hiking:
- Primary: Smartphone with offline maps (convenient for easy reference)
- Backup: Topographic map and compass (never runs out of battery)
- Know how to use both systems before you need them in an emergency
The weight and space for a paper topo map and compass is negligible. The safety margin they provide is enormous. Don't skip backup navigation to save a few ounces—it's false economy that gambles with your safety.
Topographic Maps and Compass: The Reliable Foundation
What They Are
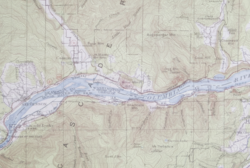
Topographic (topo) maps use contour lines to represent three-dimensional terrain on a two-dimensional surface. Each line represents a specific elevation, and the spacing between lines indicates steepness—close together means steep, far apart means gentle. These maps show trails, water sources, elevation changes, and key landmarks.
A compass is a simple magnetic instrument that always points toward magnetic north, providing consistent directional reference. Combined with a topo map, it allows you to orient yourself, identify landmarks, and navigate cross-country.
Benefits and Advantages
- Never Runs Out of Battery: Paper maps and mechanical compasses work indefinitely without power. In extended wilderness travel or emergencies, this reliability is invaluable.
- Big Picture View: Maps show large areas at once, helping you understand terrain context, alternate routes, water sources, and escape routes that screens can't convey as effectively.
- No Signal Required: Work anywhere, regardless of satellite visibility, cell coverage, or weather conditions.
- Durability: Waterproof map cases protect against rain. No screen to crack, no electronics to fail.
- Low Cost: Maps cost $10-15, compasses $10-30. One-time purchase with no subscriptions or updates needed.
- Skill Development: Learning map and compass builds terrain reading ability and spatial awareness that makes you a better navigator overall.
Limitations
- Requires Skill: Reading topo maps and using a compass effectively takes practice and education. Not intuitive for beginners.
- Can't Show Your Location: Maps don't automatically tell you where you are—you must determine position through terrain association, triangulation, or tracking your progress.
- Less Convenient: Stopping to unfold a map in wind and rain is less convenient than glancing at a phone.
- May Be Outdated: Trails change, roads are built, and maps can be years old. Check publication date and look for updated versions.
Basic Skills You Need
Understanding Contour Lines
Contour lines connect points of equal elevation. The vertical distance between lines (contour interval) is noted on the map—typically 40 or 80 feet in the U.S. Learn to read terrain:
- Ridges: Contours form "V" shapes pointing toward lower elevation
- Valleys and Drainages: Contours form "V" shapes pointing toward higher elevation
- Peaks: Concentric circles with elevation increasing toward center
- Steep Terrain: Closely spaced contours indicate rapid elevation change
- Gentle Terrain: Widely spaced contours indicate gradual slopes
Orienting Your Map
Place your compass on the map aligned with the north arrow. Rotate the map and compass together until the compass needle points north. Now the map matches the terrain around you—what's to your left on the map is to your left in reality.
Taking a Bearing
To navigate toward a visible landmark: Point the compass direction-of-travel arrow at the landmark, rotate the bezel until the orienting arrow aligns with the magnetic needle. Read the bearing (degree number) at the index line. Follow this bearing by keeping the needle and orienting arrow aligned as you walk.
Triangulation (Finding Your Position)
Identify two or three visible landmarks you can also locate on the map. Take a bearing to each landmark, then draw those bearing lines on your map from the landmarks. Where the lines intersect is your approximate position. This skill is crucial when you're unsure of your location.
What to Buy
- Maps: USGS 7.5-minute quadrangle maps (1:24,000 scale) for detailed terrain. National Geographic Trails Illustrated maps are excellent waterproof options for popular areas. Cost: $10-15 per map.
- Compass: Baseplate compass with adjustable declination (accounts for difference between magnetic and true north). Popular models: Suunto M-3 ($25-35), Silva Ranger ($40-60). Features needed: clear baseplate, rotating bezel with degree markings, direction-of-travel arrow, orienting lines.
- Map Case: Waterproof map case protects against rain and allows map reading without removing. $10-20.
Learning Resources
Don't just buy a map and compass—learn to use them. Take a navigation course through outdoor clubs, REI, or community colleges. Practice in familiar areas before depending on these skills in remote terrain. Books like "Be Expert with Map and Compass" by Björn Kjellström are excellent self-teaching resources.
Smartphone with Offline Maps: Modern Convenience
What It Is
Your smartphone can function as a powerful GPS device using apps that download topographic maps for offline use. Once maps are downloaded, GPS functionality works without cell service—your phone receives satellite signals to determine position and displays it on detailed maps.
Benefits and Advantages
- Already Own It: No additional gear purchase needed. Most hikers carry phones anyway.
- Shows Your Position: GPS pinpoints your location on the map in real-time. No triangulation or terrain association needed.
- Tracks Your Route: Records your path automatically, making it easy to retrace steps or share routes.
- Detailed Information: Apps often include trail descriptions, distances, elevation profiles, waypoints, and user comments.
- Multiple Maps: Carry unlimited maps without weight—download entire regions.
- Easy to Use: Intuitive interface requires minimal training. Most people can navigate with basic map reading skills.
- Photo Integration: Take photos that automatically include location data for trip documentation.
Limitations and Serious Risks
- Battery Life: The critical limitation. GPS and screen use drain batteries quickly. Cold weather accelerates drain. A dead phone is useless. Expect 4-8 hours of active navigation depending on phone model and conditions.
- Fragile: Screens crack, phones get wet despite "water resistance," devices fail in cold. One drop onto rock can end your navigation capability.
- Requires Satellite Signal: Dense forest, deep canyons, and heavy cloud cover can interfere with GPS signal. Initial position fix can take several minutes.
- Requires Downloaded Maps: Offline maps must be downloaded before you lose cell service. Forgetting this step leaves you with a blank screen and GPS coordinates but no map context.
- Touchscreens in Gloves: Difficult to operate with gloves in cold/wet weather. Special gloves or screen stylus helps but adds complexity.
- Over-Reliance Risk: Easy navigation can breed complacency. Users often fail to learn terrain awareness and backup navigation skills.
Essential Practices
Always Download Maps Before Your Trip
At home with WiFi, download all maps for your hiking area. Don't assume you'll have cell service at the trailhead—you probably won't. Download generously—include surrounding areas in case you wander off your planned route.
Manage Battery Life Aggressively
- Enable airplane mode (GPS still works but prevents constant cell signal searching)
- Reduce screen brightness to minimum usable level
- Turn off GPS when not actively navigating—check position periodically rather than continuous tracking
- Carry external battery pack (10,000+ mAh) for multi-day trips
- Keep phone warm in cold weather (inside jacket, not external pocket)
- Consider battery case for longer trips
Protection and Durability
- Use rugged case with screen protection
- Waterproof bag or case (dry bag, Ziploc, or specialized phone case)
- Keep secure—use wrist strap or chest pocket, not pants pocket where it can fall
Mark Waypoints
Mark your trailhead, camp location, water sources, and junctions as you travel. If you need to navigate back in low visibility or darkness, these waypoints are invaluable.
Recommended Apps
- Gaia GPS: Professional-grade with multiple map layers, excellent offline functionality. Subscription: $20-40/year. Highly recommended for serious hikers.
- AllTrails: Huge trail database, user reviews, photos. Good for researching and following established trails. Subscription: $30-60/year.
- Avenza Maps: Free app with purchasable maps. No subscription. Good budget option.
- CalTopo (via web app): Powerful free web-based tool that can be used offline if you save pages. Favored by search and rescue professionals.
- OnX Backcountry: Excellent property boundary and land management data. Subscription: $30-100/year.
The Bottom Line on Phones
Smartphones with offline maps are excellent primary navigation tools for most hiking. They're convenient, accurate, and intuitive. However, they are not sufficient as your only navigation system. Battery failure is not an "if" but "when" question on multi-day trips. Always carry backup map and compass.
Dedicated GPS Devices: Specialized Reliability
What They Are
Dedicated GPS devices are purpose-built navigation computers designed specifically for outdoor use. Brands like Garmin, Magellan, and others make handheld units that receive satellite signals, display your position on detailed maps, and provide navigation features without relying on cell networks or internet connectivity.
Benefits and Advantages
- Better Battery Life: 15-30+ hours on a single charge or set of batteries. Some models use AA batteries allowing indefinite runtime with spare batteries.
- Purpose-Built Durability: Designed for outdoor abuse—shock resistant, truly waterproof (not just water-resistant), function in extreme cold and heat.
- Better GPS Reception: Dedicated antenna and processing provide faster satellite acquisition and better signal in difficult terrain than phones.
- Easier with Gloves: Physical buttons and simpler interfaces work with gloves in cold weather better than touchscreens.
- SOS/Emergency Features: High-end models include satellite communication for emergency messages from anywhere (requires subscription).
- Dedicated Tool: Does one job exceptionally well without distractions of phone notifications or temptation to use for other purposes that drain battery.
Limitations
- Cost: Entry-level units start around $200, advanced models $400-700+. Significant investment for a single-purpose device.
- Less Intuitive Interface: Learning curve is steeper than phone apps. Interfaces can be clunky compared to modern smartphone UX.
- Map Costs: Detailed topographic maps often cost extra ($30-100+ per region depending on model). Some manufacturers charge for map updates.
- Additional Item to Carry: Another device in your pack rather than using phone you already have.
- Smaller Screens: Typical 2-3 inch screens show less map context than phone screens (though newer models have larger displays).
- Still Electronic: Can fail, though less likely than phones. Still a good idea to carry paper backup.
Who Needs a Dedicated GPS?
Consider a GPS device if you:
- Do multi-day trips where phone battery life is insufficient even with external battery
- Travel in extreme conditions (winter mountaineering, desert, extreme cold) where phones fail
- Navigate off-trail frequently and need reliable real-time positioning
- Want satellite communication/SOS capability for remote travel
- Are professional guide or SAR volunteer who needs maximum reliability
For most recreational day hikers and weekend backpackers, a dedicated GPS is nice-to-have rather than essential. A smartphone with offline maps plus paper map backup covers navigation needs adequately and costs much less.
Popular Models
- Garmin eTrex series ($150-300): Entry-level, compact, uses AA batteries. Good starting point for GPS navigation.
- Garmin GPSMAP 66 series ($350-500): Larger screen, excellent battery life, highly durable. Popular with serious backpackers.
- Garmin inReach Mini/Messenger ($300-400 + subscription): Satellite communication (text messaging) with basic GPS. Excellent safety device for remote travel.
- Garmin Montana series ($500-700): Large touchscreen, advanced features, extensive mapping. Professional-grade device.
Using a GPS Effectively
Like any navigation tool, GPS devices require practice. Learn the interface, understand waypoint and route creation, practice tracking, and familiarize yourself with all functions before depending on the unit in the backcountry. Read the manual (seriously), and practice on local hikes.
Common Navigation Mistakes
Mistake #1: No Backup Navigation
Relying solely on your phone is gambling with your safety. Batteries die. Phones break. Always carry paper map and compass as backup. The 6 ounces they add to your pack could save your life.
Mistake #2: Never Learning Map and Compass
Many hikers own a map and compass but don't actually know how to use them. They're "backup" in name only. If you can't use them, they're useless. Take a class, read a book, practice at local parks. Learn before you need it.
Mistake #3: Not Downloading Offline Maps
Getting to the trailhead and discovering you forgot to download maps is frustratingly common. Make downloading maps part of your pre-trip routine, just like packing food and checking weather.
Mistake #4: Burning Battery on Photos and Social Media
Using your phone for photos, checking social media "just in case there's signal," or playing music drains battery needed for navigation. Bring a separate camera or be disciplined about phone use. Airplane mode is your friend.
Mistake #5: Not Tracking Progress
Whether using map and compass or electronics, track your progress continuously. Note landmarks passed, time at junctions, and distance covered. If you realize you're off-route, knowing where you went wrong makes recovery much easier.
Mistake #6: Ignoring Terrain Awareness
Staring at a GPS screen while walking means you're not reading terrain, noticing landmarks, or developing route-finding intuition. Look up frequently. Engage with your surroundings. Good navigators constantly correlate what they see with what the map shows.
Mistake #7: No Contingency Plan
Before every hike, identify bail-out routes, nearby trails, and directions to roads or civilization if you need to abandon your plan. Know what's north, south, east, and west of your route. If you get lost, this knowledge is crucial.
Practice Navigation Before You Need It
The Skills Gap
Most hikers massively overestimate their navigation abilities. Reading about map and compass is not the same as using them. Watching YouTube videos about GPS doesn't develop muscle memory for operating buttons with cold, gloved hands. You must practice navigation skills before an emergency requires them.
Low-Stakes Practice Locations
Start in safe environments where getting lost is inconsequient:
- Local Parks: Practice orienting maps, taking bearings, and identifying features on familiar trails where you can't actually get lost.
- Neighborhood Navigation: Use map and compass to navigate residential streets. It feels silly but builds fundamental skills without risk.
- Short Hikes: On well-marked local trails, practice continuous position tracking. Stop regularly and identify your position on the map.
- Off-Trail in Safe Areas: In open areas (meadows, parks) where you can see your starting point, practice navigating to waypoints you've marked.
Progressive Skill Building
Beginner Level
- Orient a map to terrain using compass
- Identify your position on map using nearby landmarks
- Follow a trail while tracking progress on map
- Take simple bearings to visible landmarks
- Download offline maps and practice using phone app on easy trails
Intermediate Level
- Navigate to a waypoint using compass bearing
- Determine position by triangulation when uncertain
- Plan route on map including distance and elevation calculations
- Navigate off-trail to visible destination
- Identify terrain features (ridges, valleys, peaks) from map study before seeing them
- Use GPS device or phone to navigate cross-country section
Advanced Level
- Navigate cross-country without trails using map and compass only
- Relocate yourself when lost using terrain association and triangulation
- Navigate in low visibility (fog, darkness) using careful bearing and pacing
- Plan and execute complex off-trail routes involving multiple waypoints
- Teach others basic navigation skills (teaching solidifies your own knowledge)
Deliberate Practice Plan
Set navigation goals for each hike. Examples:
- "Today I'll stop at every junction and identify it on my map before checking the phone app"
- "I'll take a bearing to that peak and see if I can walk toward it without looking at GPS"
- "I'll mark waypoints for all water sources and camp options as I hike"
- "I'll intentionally navigate using only map and compass, using phone only to verify my position afterward"
Consistent deliberate practice builds real competence. One day your phone will die, or fog will roll in, or you'll take a wrong turn. When that happens, practiced skills become automatic and manageable. Unpracticed panic and uncertainty can turn a minor problem into a serious emergency.
Navigation Best Practices and Tips
- Check Your Navigation Gear Before Every Trip: Ensure phone is charged, maps downloaded, GPS has fresh batteries or full charge, and compass functions properly (sometimes they get damaged). Don't discover problems on the trail.
- Share Your Route: Leave detailed trip plan with someone reliable including trail names, planned campsites, and expected return time. If you don't return, rescuers need to know where to search.
- Mark Your Trailhead: First thing at the parking area: mark a waypoint for your vehicle. Sounds obvious, but it's easy to forget and surprisingly helpful at the end of a long day.
- Regular Position Checks: Stop every 30-45 minutes to verify your position. Quick check prevents small navigation errors from becoming big problems. Catching mistakes early is much easier than recovering from being deeply lost.
- Trust Your Compass, Not Your Gut: Humans have terrible internal direction sense. If your compass says north is left but your gut says it's straight ahead, trust the compass. Gut feelings lead people in circles.
- Learn Declination: Magnetic north and true north differ by varying amounts depending on location (declination). In the Pacific Northwest, declination is 13-16 degrees east. Quality compasses allow declination adjustment. Understanding this prevents significant navigation errors.
- Night Hiking Preparation: If you might be hiking after dark (unexpected delays), ensure you can navigate in darkness. Headlamp, familiarity with trail, and marked waypoints are essential. GPS/phone screens work well in darkness; map and compass are challenging.
- Create a Route Card: On complex routes, write a detailed route description with distances and key features: "Mile 2.5 - pass small lake on left, trail crosses creek, Mile 3.8 - junction with Ridge Trail, turn right." During the hike, you can verify progress against this card.
- Download Multiple Map Types: Different maps emphasize different features. Download both topographic maps and satellite imagery. Sometimes terrain is clearer on satellite images, sometimes on topo maps.
- External Battery Best Practices: On multi-day trips, charge phone from external battery overnight at camp when you're stationary. Don't use phone for navigation during the night when you're not moving. Ration battery between navigation and emergency communication capability.
Navigation competence is a fundamental wilderness skill that every hiker should develop progressively. Start with convenient phone navigation backed by paper maps you gradually learn to use. Practice regularly in low-stakes environments. As your skills and confidence grow, you'll navigate more efficiently, explore more confidently, and handle unexpected situations with competence rather than panic.
The technology is wonderful—GPS on phones has made navigation more accessible and helped countless people explore wilderness safely. But technology is a tool, not a substitute for knowledge and judgment. The best navigators use technology effectively while maintaining traditional skills as backup. They understand terrain, track their progress, and stay oriented regardless of which tools they're using.
Remember: the goal isn't using the fanciest navigation gear. The goal is getting where you're going safely and confidently, then making it home. Simple tools used skillfully beat fancy tools used poorly every time. Start learning navigation skills today on your local trails. Your future self, navigating through fog on an unmarked trail with a dead phone, will be grateful you did.